This support page is designed primarily for teachers and other staff in schools, but learners may find it useful as well.
If you need technical support, please email the University’s technical support service IS.Helpline@ed.ac.uk with IOT in Schools in the subject of the email. It will then be passed to our engineers to fix.
Arrival of sensor technology in school
Your sensor technology will arrive in a box, probably delivered by DHL or one of our engineers. In the box, you will find….
|
1 x Tektelic Gateway 1 x power supply for the gateway 1 x Aerial for the gateway 1 x spanner (for tightening the aerial onto the gateway) |
 |
| Elsys CO2 Sensors |  |
| 1 x Information sheet with contact details and links to this page |
 |
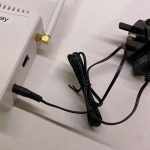
| First of all, attach the aerial to the aerial socket on the gateway. You can screw the aerial onto the aerial socket and tighten it with your fingers. |
 |
| Use the little spanner to tighten the nut. Not too tight though, just a little bit of pressure. |
 |
| You are now ready to connect the power supply. The plug is a push fit into the socket. |
 |
| Then you can plug in the gateway. Please note that this should remain plugged in 24/7/365 as it will listen for sensor traffic within the school and surrounding community. The gateways used in pilot phases 1 and 2 are connected to the mobile phone network by 4G. We may therefore ask you to move this in the school so that it can get a mobile signal. |  |
| All schools will receive at least two Elsys CO2 indoor sensors. These measure CO2, Light levels, Temperature, Barometric Pressure, Humidity and Presence. | |
| The sensors should arrive with two plastic tabs that can be removed to connect the batteries and start the sensor working. |  |
|
Learners should think carefully where the sensors should be placed and most classes will experiment for several weeks before deciding on the best location. Note that there are vents above and below the sensor to allow the air to flow through it.
Problem-solving the best location for data collection is a valuable task to complete. |
 |
The data from your sensors should appear soon after you set them up. You can link to your data from this page.
Should you require support at any point during the project, there are staff at the University of Edinburgh that can help.
For any delivery and technical issues, send an email explaining your problem to IS.Helpdesk@ed.ac.uk. Put IOT in Schools in the Subject of the email.
For any learning and teaching matters, contact tommy.lawson@ed.ac.uk and the Data Education Team in Moray House will lend a hand.
For pilot schools with grant funding, contact Jo.Spiller@ed.ac.uk, Data Education Team in Moray House for any grant-related enquiries.
4G Gateway Reset
 There may be a need at some point to reboot the gateway. As you know these should be permanently plugged into its power adapter. There is no reset button and the battery tends to keep the gateway going for 3 – 4 hours in the event of the power going off.
To reboot the gateway, turn it off at the end of the day. It will remain on batter power. The next morning, turn the gateway on again and it should reconnect to the sensors and the university servers.
Indoor Sensor Reset
The engineers may ask you to reboot the sensor at some point. One sensor may be working but the other one isn’t or there has been a software update. It will take you about two minutes to do.
| Turn the sensor over and place on the table. | 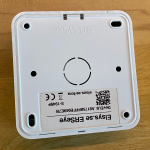 |
| Use a paper clip or small screw driver to carefully prize open the clip. | 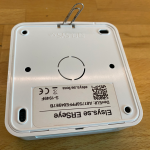 |
| Use a paper clip or small screw driver to carefully prize open the clip. | 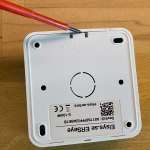 |
| Remove the back cover of the sensor | 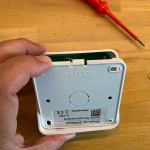 |
| Your sensor may look a little different inside to this one. Some may have one battery, others two. Note that although these look like AA batteries, they are not. These are long life 3.6V Lithium batteries and can’t be replaced with 1.5V AA batteries. | 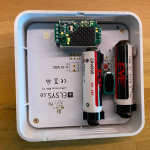 |
| In between the batteries (if there are two) you will find a little reset button. Use your finger or a pen/pencil to hold down the button for at least 5 seconds. The lamp on the sensor may flash. | 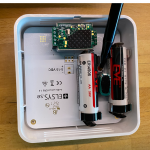 |
| Now, replace the back cover on the sensor. There is a little lip on the opposite end to the clip. | 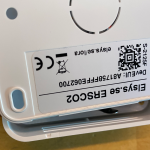 |
| Now push the open end until it clicks shut. | 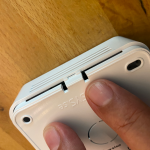 |
| Job complete, well done! | 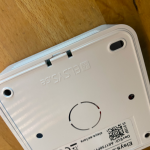 |